
Start with one project
On the homepage, choose Create account or the closing Start free link; no card is required. Choose Log in in the top navigation if you already have an account. Features, Pricing and Log in are directly visible on mobile too.
On compact Features and Pricing pages, open Menu for these links. The current page is marked, and each link has room to tap. The menu works with touch or keyboard, including when JavaScript is disabled.
Choose See plans below the introduction to compare Free and Pro before creating an account. Choose Pro keeps your selected monthly or annual period through sign-in. In Your projects, choose Review Pro on the project you want to upgrade; you review its total before paying.
The homepage introduces one connected flow: turn feedback into briefs and verify improvements. Its centered headline keeps three balanced lines on desktop and four evenly spaced lines on mobile. Briefs collect the proposed change and its checks for your builder. The blue words and icons gently change to show other examples. Hover, keyboard focus or selection stops the automatic rotation; select a word with touch, click or Enter to choose another example. Word changes keep the content below in place. Reduced motion keeps the first examples still and disables the flip transition. The six feature cards below link to more detail. Your builder makes the change; a Mission result still needs a permitted person's deliberate verification.
Create an account at Astor. Select Add my own project (optional) during registration to set up your first project, or choose Add project later in Your projects. Leave the option unchecked when you only need to join an invited project. Give your project a name and add its published website address. A project keeps its own feedback, tickets, people, context and capacity together. Different websites for the same product can be environments of that project.
Later, open the project dropdown to switch projects, return to Your projects or choose Add project. Your projects keeps management, context and settings on each project card, with archived projects under Archived.
Your workspace includes one Free project. The creation form shows its included internal team members and monthly units; testers are free. Extra projects use Pro with the same core workflow and more capacity. Choose Yearly or Monthly to review the exact project subscription. The plan card shows the selected project price once. Existing subscriptions and the new total appear separately when they affect the bill; an unknown amount stays To confirm. Changing the billing period waits for its own price check before saving. Saving a project never silently charges you; review any activation price before continuing to checkout.
Set up your website
- In Project setup, choose Add project context so Astor understands the product. Saving or closing returns you to your setup steps. You can also open Project context from your card in Your projects later.
- Follow the installation guide and publish the script on your website.
- Choose Verify installation. A successful check shows Verified.
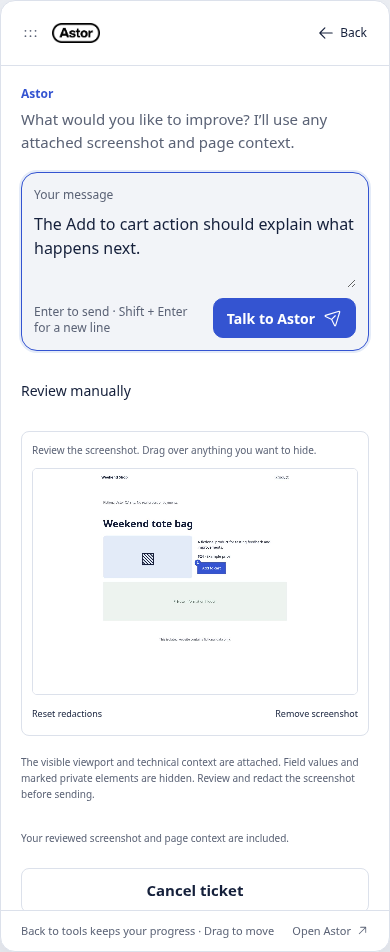
- Open the feedback panel on your website and leave your first observation.
- Review it in Inbox and choose the next step.
For a Pro project awaiting activation, setup shows the full yearly or monthly price, before applicable tax. Any approximate monthly equivalent is secondary. Choose Review project cost to check the total before continuing to Polar. Installation does not confirm payment or activate project access.
Optional toolbar and private website settings can wait until you need them. Website research is optional too; manual context editing is free and does not block installation.
Saving a project without website research does not start AI work. If optional research is unavailable, your project still saves so you can continue setup.
 View full size · opens in a new tab
Invite people when you are ready
Open Users to invite a teammate or tester. A tester gets a personal link and joins with an Astor account. They do not need a subscription or payment details.
For a focused test, create a Mission and include it in the invitation. For open exploration, ask the tester to try the product and leave feedback.
Follow the improvement
Feedback starts in Inbox. Chosen improvements become Tickets, where you clarify the problem, agree on the change, review the implementation and verify the result. A completed analysis or agent job never replaces your approval.
Build feedback, Mission results and Live findings can support the same ticket. You choose which tools to activate; installing the script does not turn on Live collection automatically.
Read public information
The homepage, feature pages, prices and documentation can be read without JavaScript. Account and plan links keep their destination and selected billing period. JavaScript is needed to sign in, use your workspace or try the interactive product previews. Public information never gives access to a private project.
Find a guide
On a phone, choose Browse documentation to open the guide menu. The current guide is marked; choose another ordinary link to navigate. The guide menu and links also work when JavaScript is disabled. Choose Open Astor to return to your projects.
Use Search documentation to look for a topic such as tickets or live. A matching topic guide appears before detailed API operations. Search for an operation such as GET tickets or an exact MCP tool name when you need its contract. The search page also lists guides without JavaScript.